Watch Photography 101: Part 1 – Basic Lighting

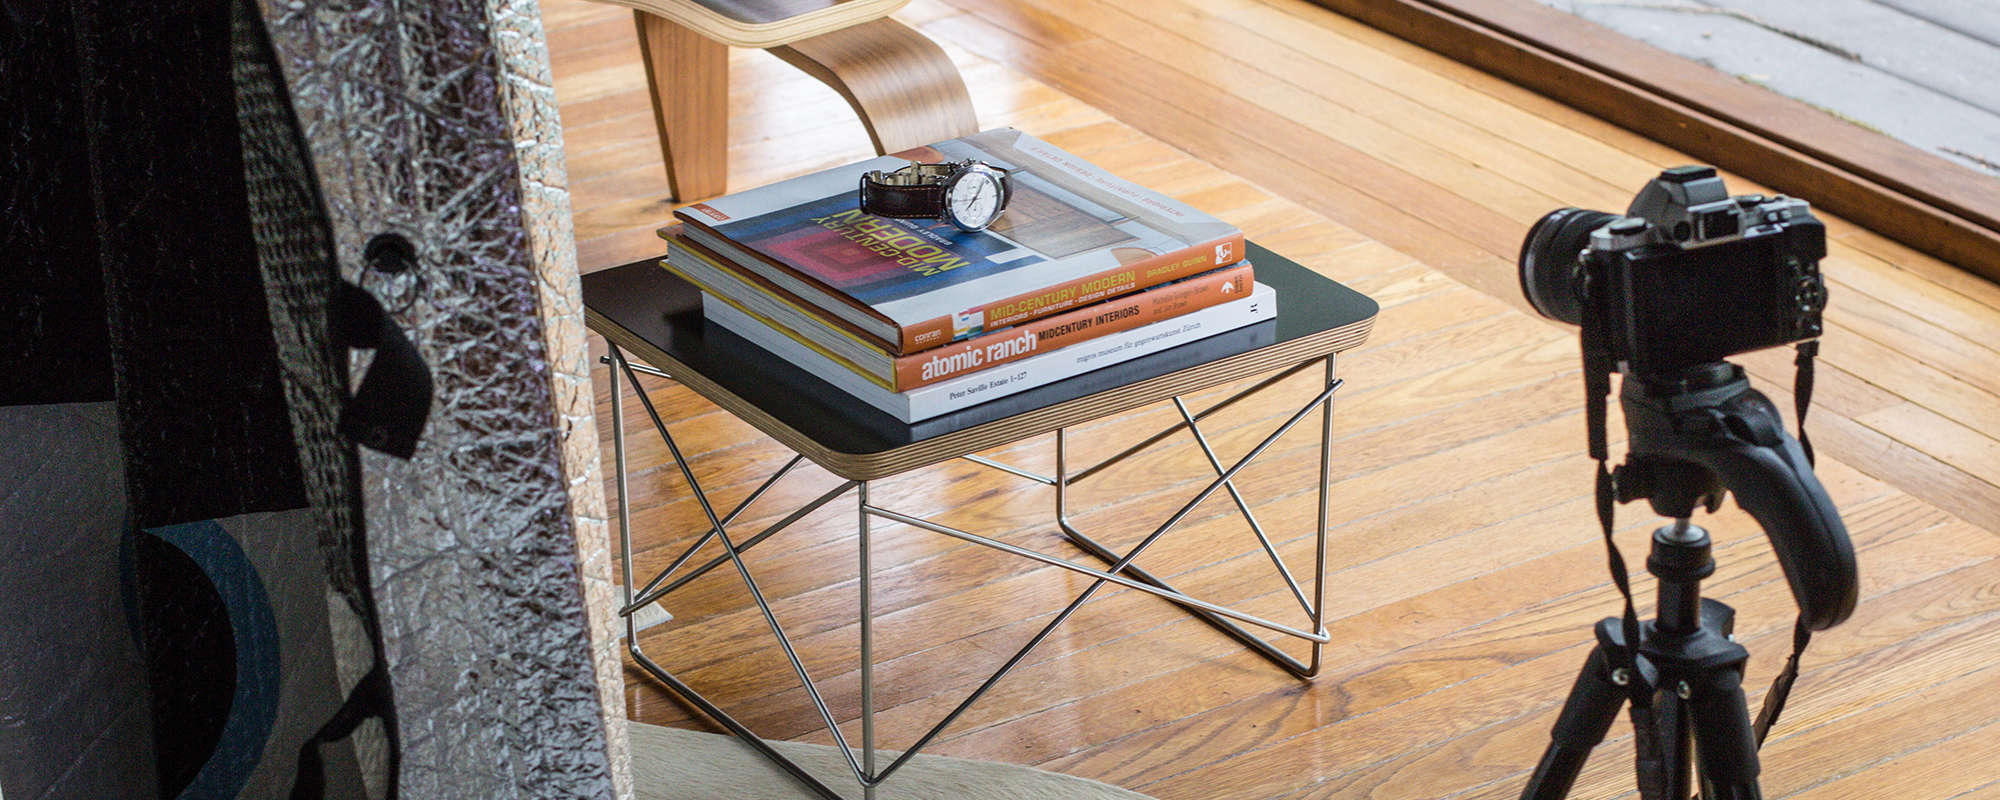
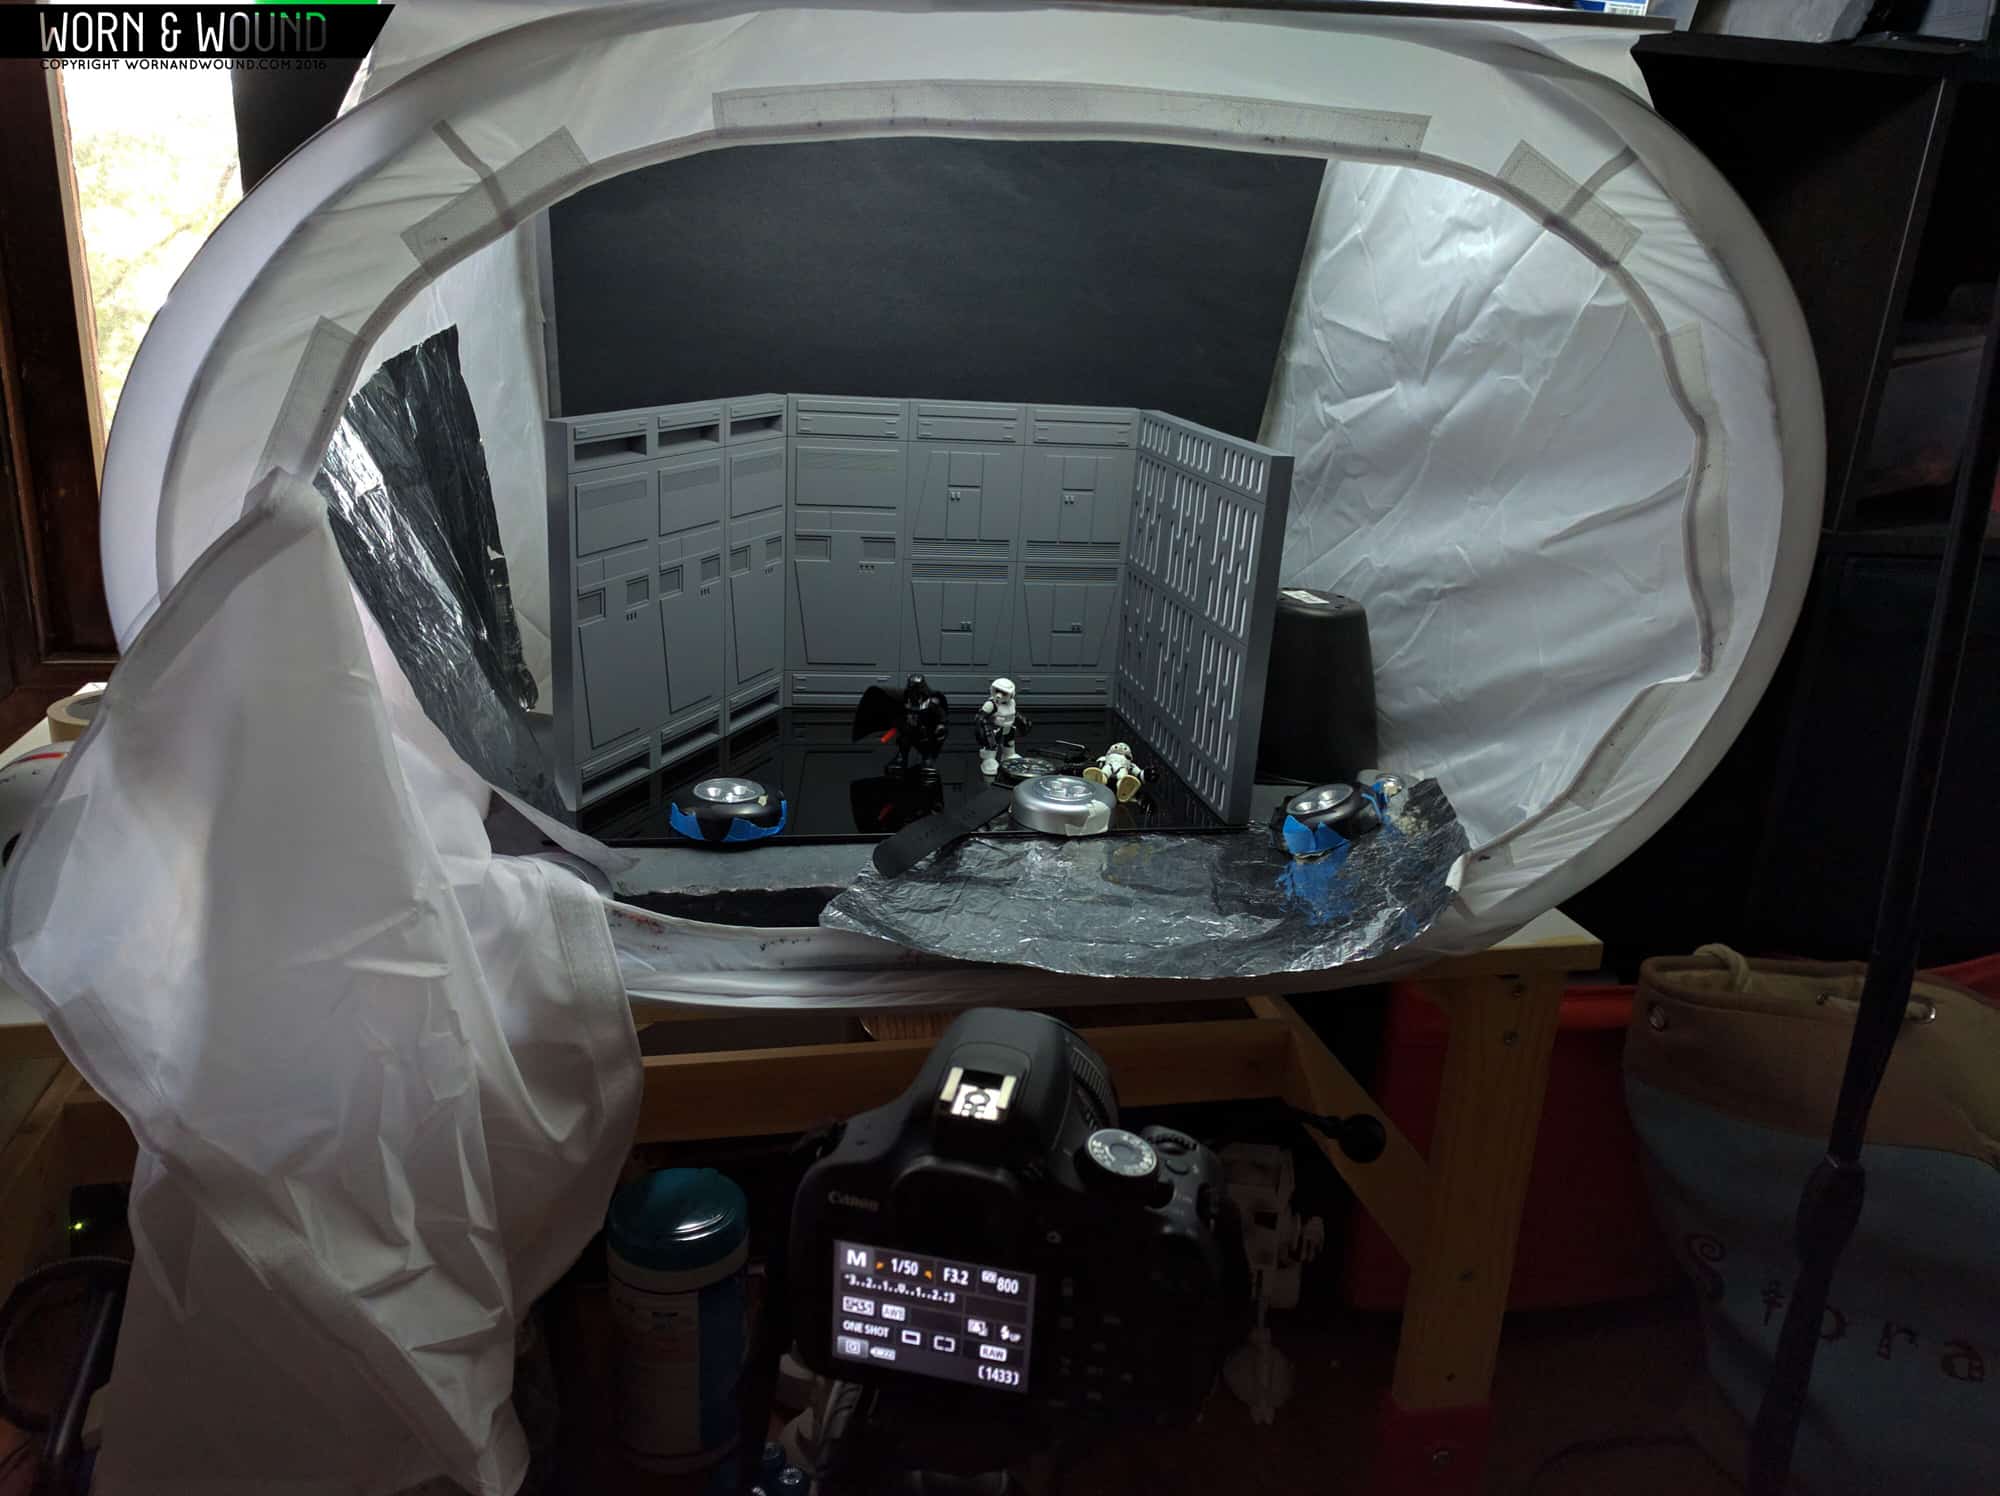
This almost goes without saying, but we take a lot of photographs of watches here at worn&wound. We are often asked about our process (which we briefly addressed in Episode 7 of The worn&wound Podcast) by enthusiasts looking to build on their skill-set. So today, we’re kicking off a short series we’re calling Watch Photography 101 with the goal of doing just that. In this inaugural installment of the series, Hung Doan will break down a key aspect of watch photography that often goes overlooked—basic lighting.


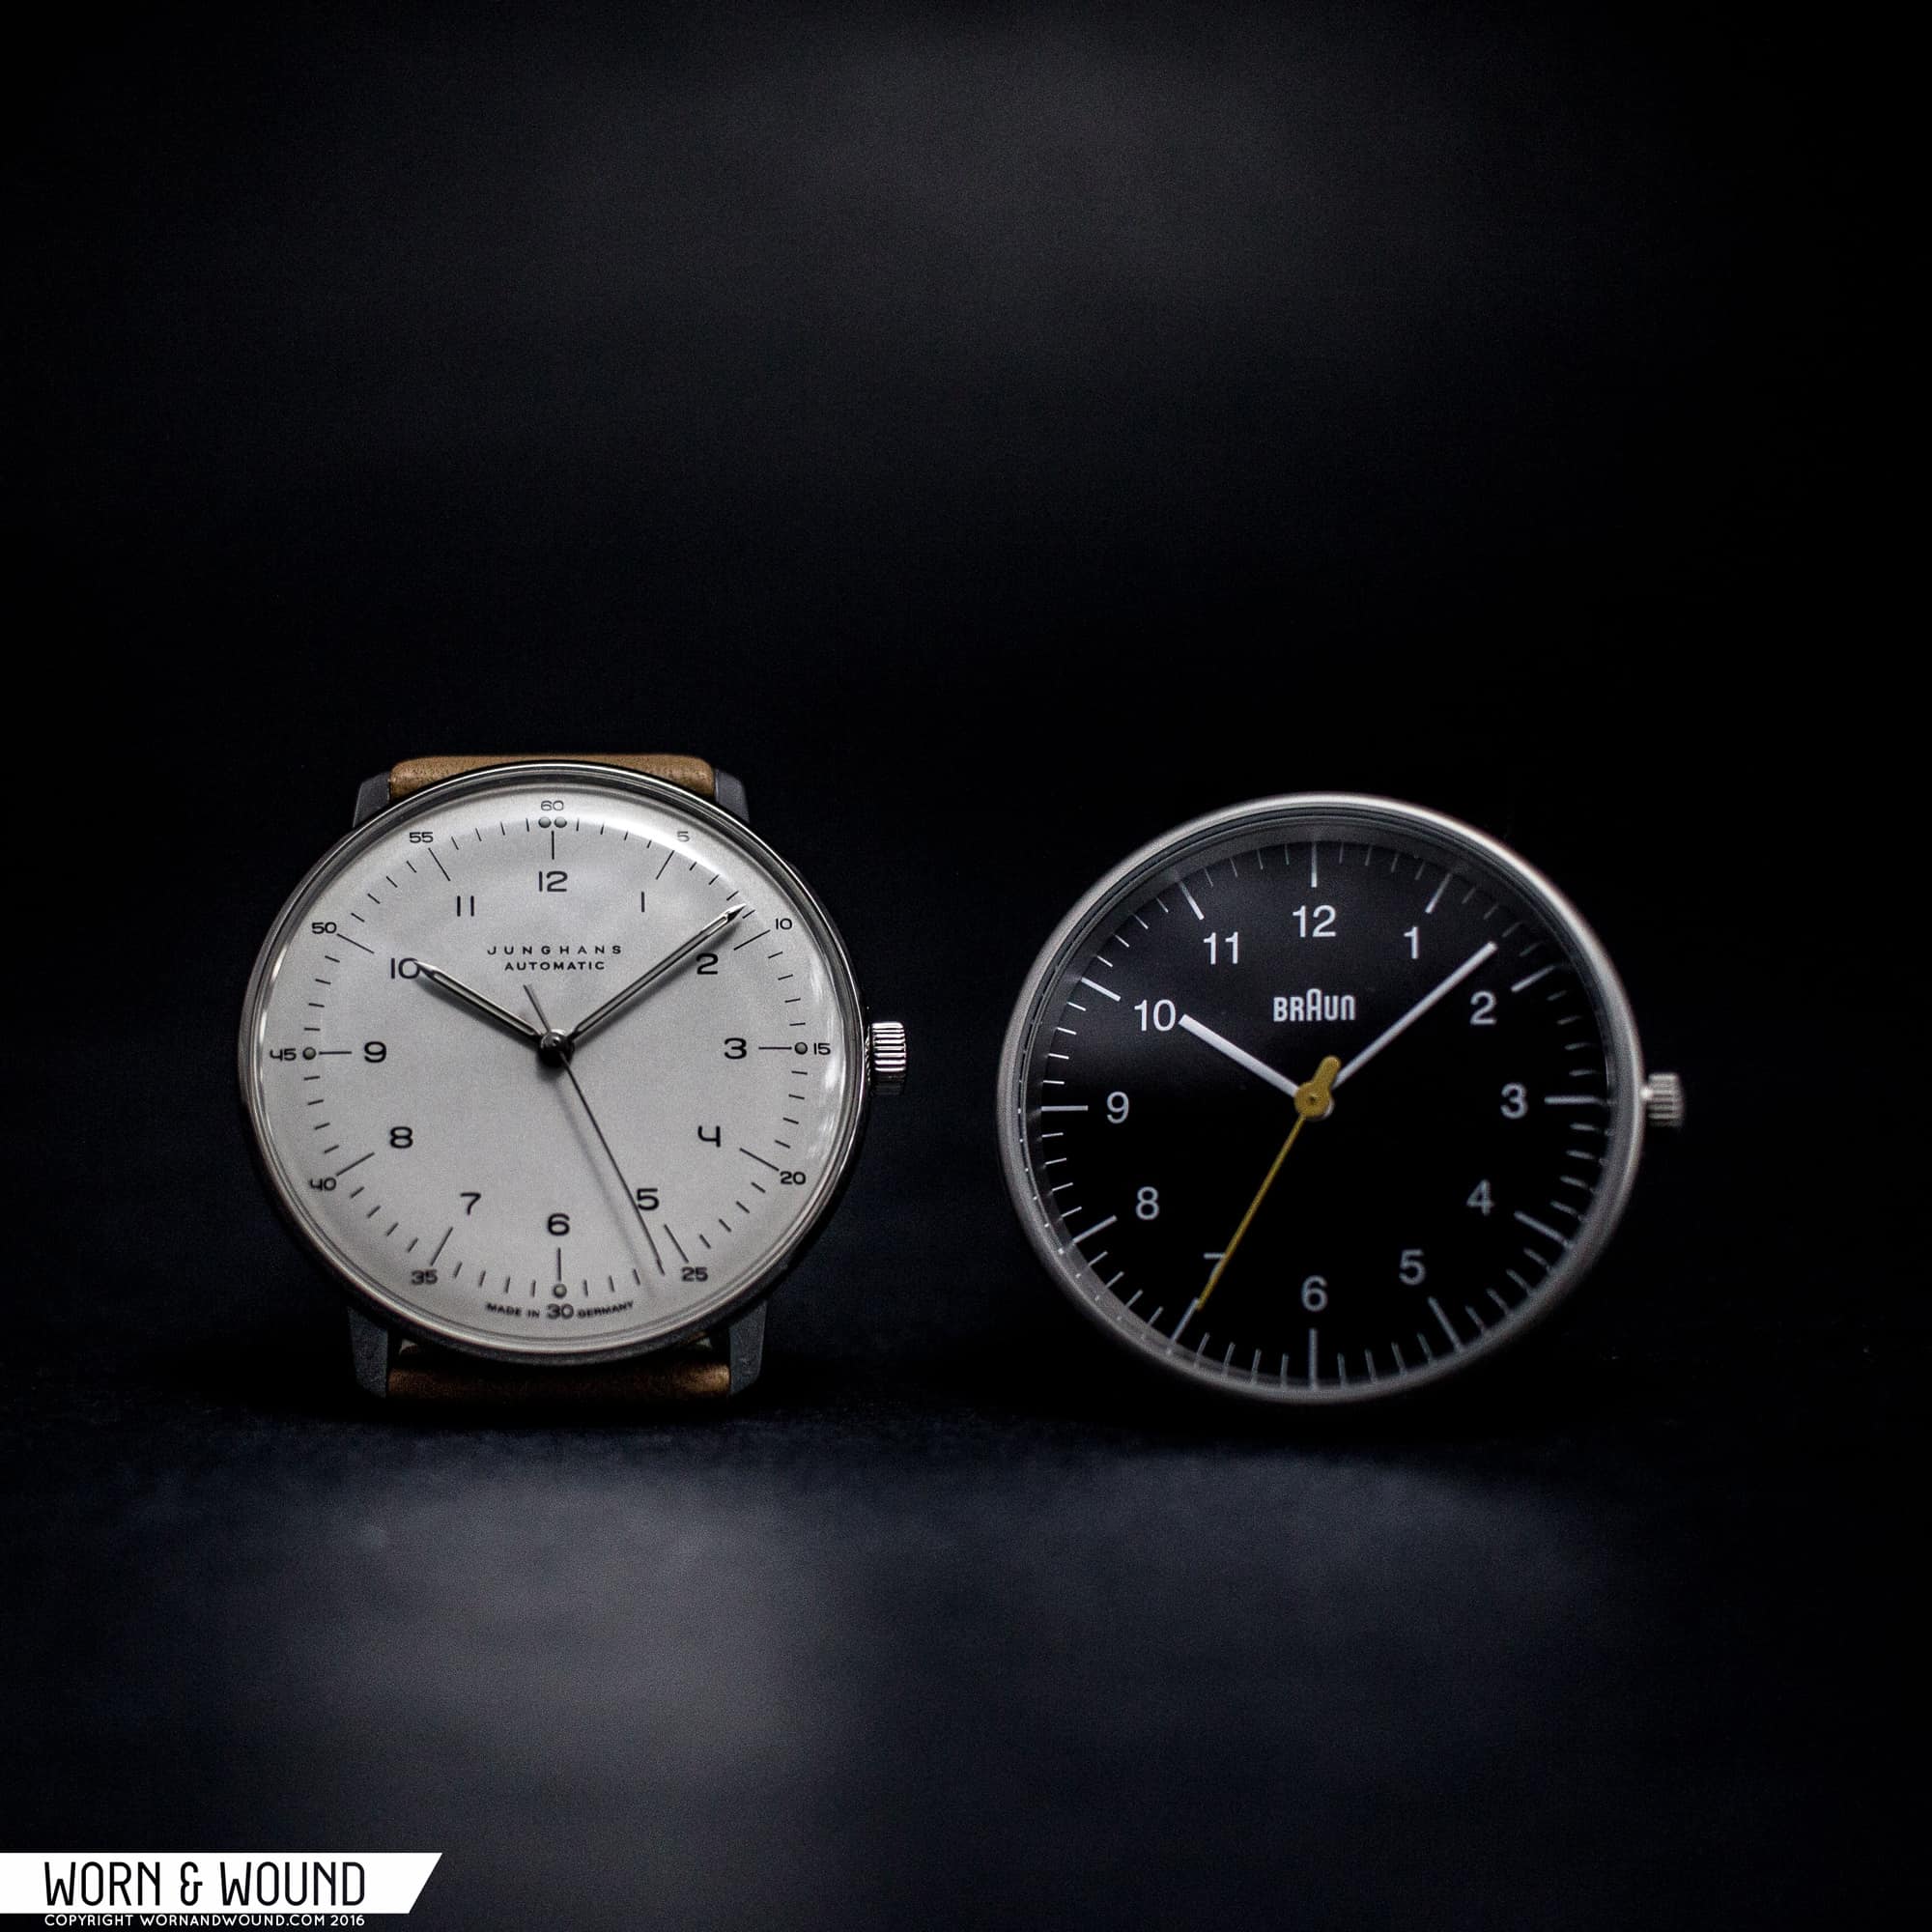
After collecting watches, some of us enthusiasts evolve into photographing our prized possessions. Photography is a natural byproduct of this hobby. Before the scratches appear, you may want to document a watch while it’s still fresh and new. Or you may simply want to share your latest acquisition across social media.

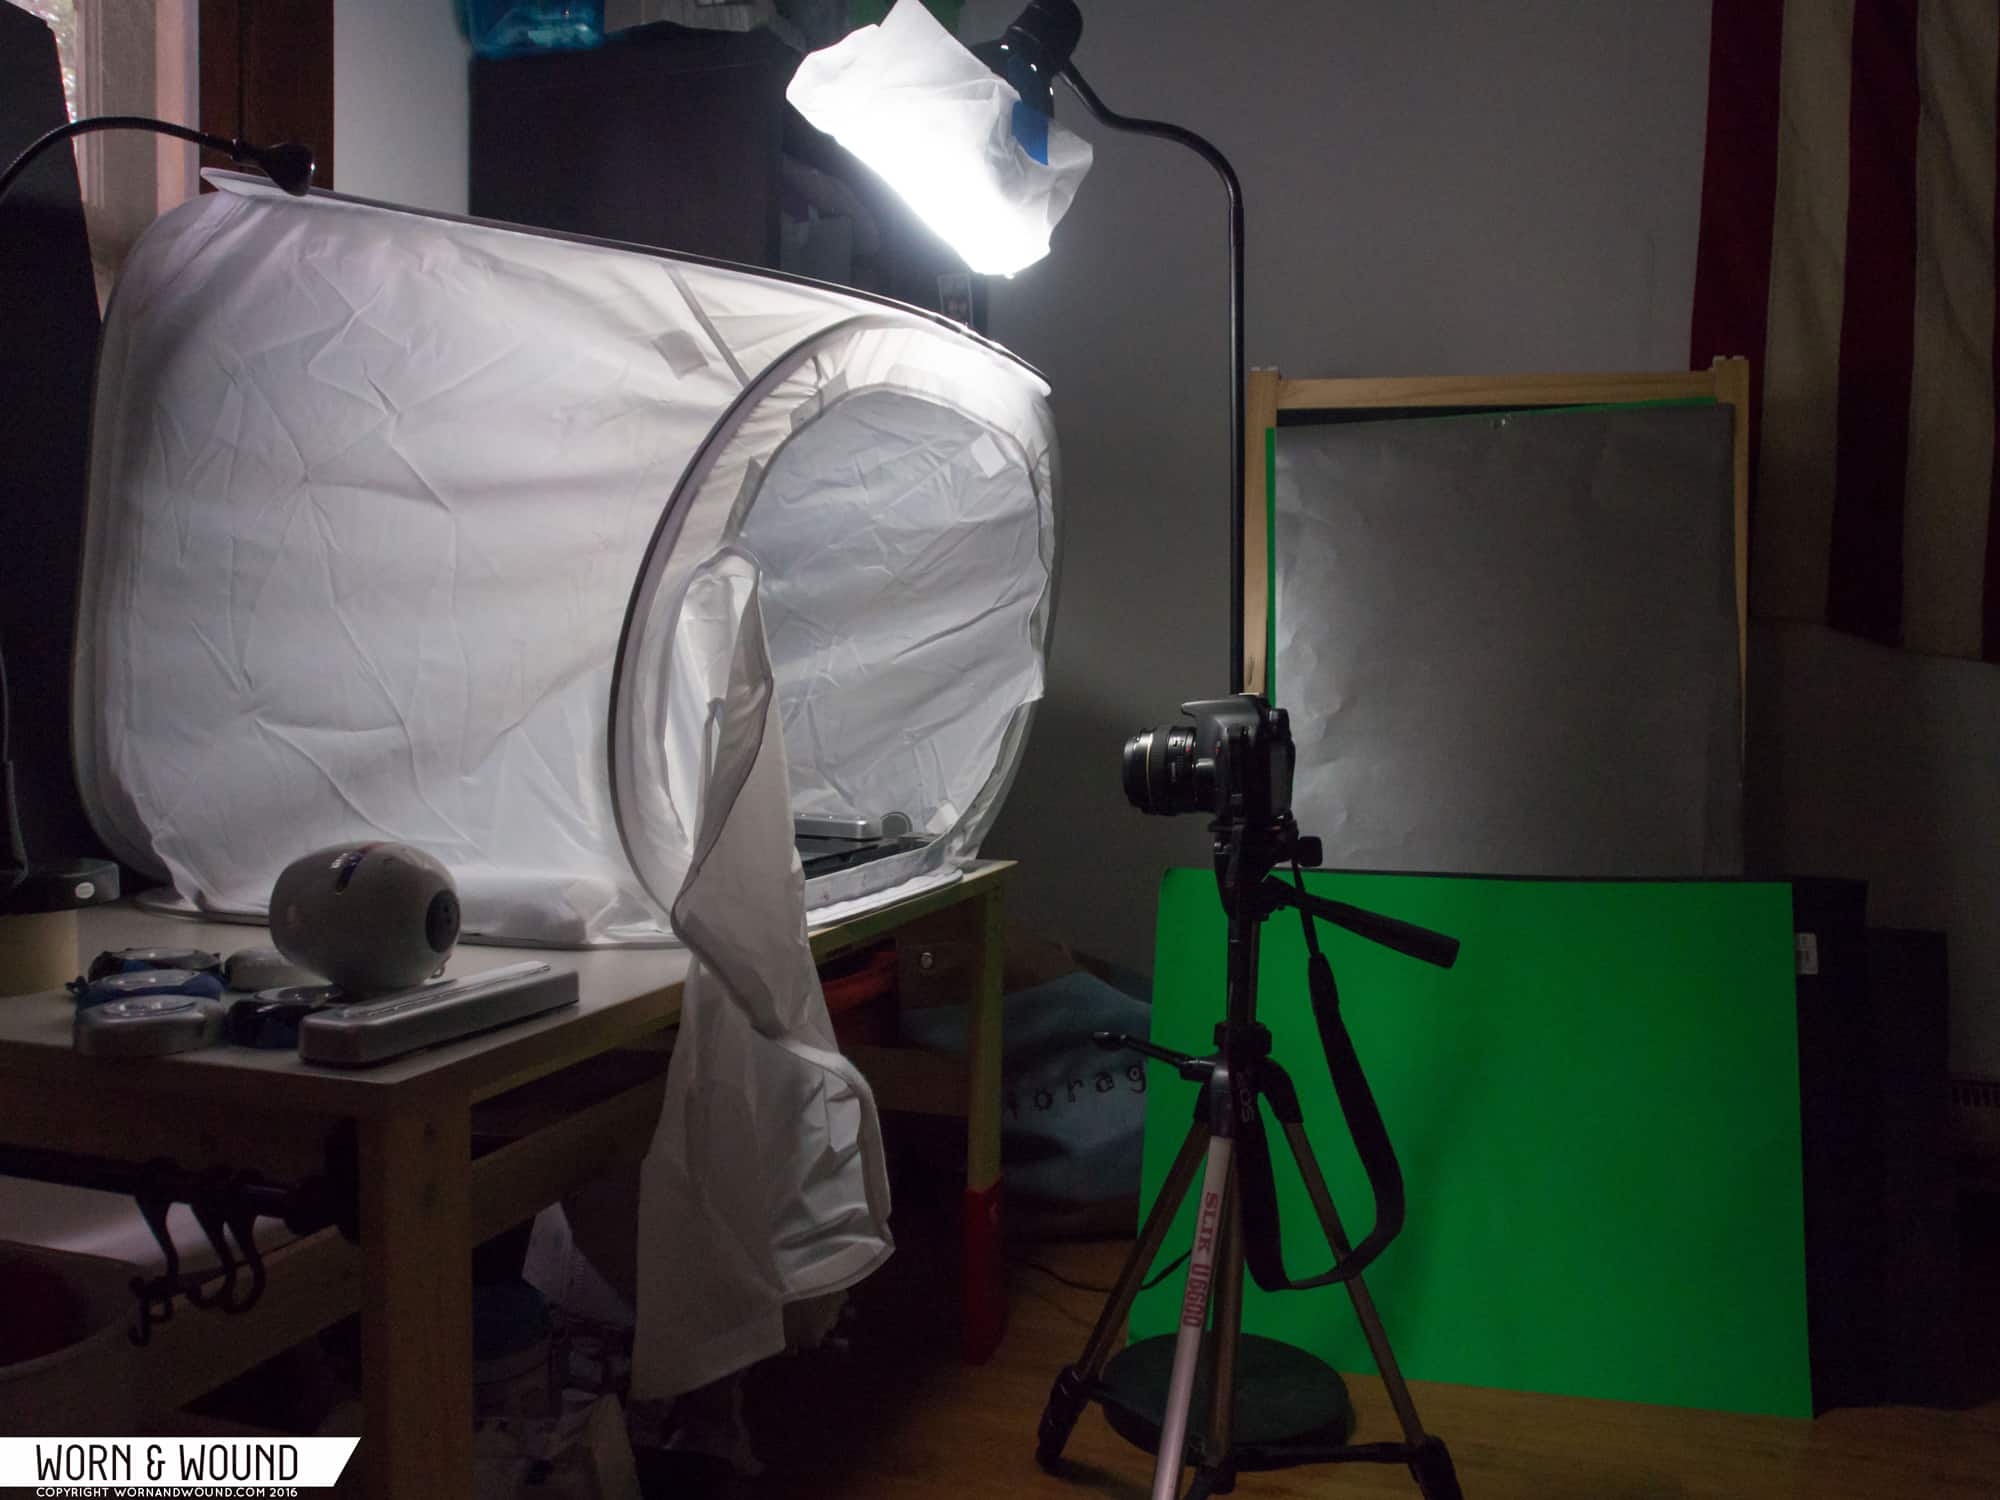
My interest in watch photography began with the rise of watch-interest forums 20 years ago. I started with a 3.3 megapixel CoolPix Nikon camera (how far we’ve come) and over the years, I’ve learned a few tricks that I have since applied to my hobby (I’ve also spent the past 20 years working in the advertising industry, so I’ve dabbled in pro-level work and polish). Today, I shoot with a Canon Rebel,
various micro-four-third cameras, and, of course, my smartphone. This is, by no means, professional gear and it’s not without its limitations, but for my purposes and for the purposes of this guide, it works just fine. Let’s get to some of the basics.

Save

Advertisement

Hands at 10:10

In watch photography, I believe there are only two major considerations and everything else is left to your personal aesthetic preference. The first is the 10:10-time setting (that is, the hour hand is placed at 10 o’clock, and the minute hand at or around the ten-minute mark). The 10:10 rule provides many benefits, among them symmetry and a clear view of the branding or logo. Many of us break this rule when we snap impromptu wrist shots for Instagram, but for more involved efforts you should follow this rule as it looks good and it’s consistent. Quite simply, it gives your presentation a more professional look.

Save

Save

Save

Save

Save

Save

Save

Save

Save

Save

Save

Save

Save

Save

Save

Lighting is Key

The second detail to note–and frankly, it’s the most important consideration–is lighting, and it’ll be the remaining focus of today’s article. Lighting can be a friend or foe in your watch photography. If you over-expose, you’ll get undesirable glare and blown highlights (highlights are the brighter areas of an image, and shadows refer to the darker regions). If you get a severely over-exposed image, you won’t have enough information in the file to salvage the blown areas (this is especially true in digital photography). Conversely, if you lack the necessary light for a given situation, you’ll likely end up with a flat, dim image.

“What makes photography a strange invention is that its primary raw materials are light and time.”

– John Berger

Save

Natural Lighting

Natural light is one of the most obvious ways to go about lighting your shot. It’s what most of you will use, and the best part is that it won’t cost you anything. Personally, I prefer the more realistic single-light source visuals that natural light produces. In terms of the light source, you generally want something softer and more diffuse, e.g., the type of light one gets early in the morning or on an overcast day.

There is generally no setup involved here, but if you want to improve your photos, you can supplement your naturally lit subject with some accessories. Indoors, I often recommend taking photos near windows to allow an even spread of the light on your subject. If you require more coverage or you want to remove some shadow, you can use a reflector which helps bounce light onto your subject with what is called a fill light. A low-cost way to go about this is to use an aluminum-backed automotive shade that can be found at a discount or auto store. In the past, I’ve also used aluminum foil attached to a piece of cardboard.

Here, you can see my very capable four-year-old assistant helping me light a shot next to an open window. She’s holding an inexpensive car shade, which is creating a fill along the left side of the watch. Below, you can see the before image without the fill, and the after image with the fill. The latter shows extra light cast on the top-left portion of the case and shadows.

Save

Save

Save

Save

Save

Save

Save

Save

Save

Save

Save

Save

Before – without fill.
After – with fill.

One of the joys (and some might argue frustrations) of shooting with natural light is that it can be unpredictable. It may be sunny one moment and completely overcast the next. You can, of course, invest in extra gear to help control such variables, but that’s outside the scope of this very fundamental guide.

But one thing you should consider here is the “temperature,” or color, of the light. Without getting too deep into the weeds, different sources of light have their own color cast, which generally ranges from red to blue on a spectrum. This is measured in Kelvins, with candlelight reading quite red (at about 1,000K) and a clear blue sky reading very blue (about 10,000K). You can manually balance your camera to your lighting situation to get a more accurate representation of the light, or you can set your camera to AUTO should you prefer something a bit more simple. Check out this handy guide on color temperature to learn more.

Save

Save

Save

Save

Save

Light Boxes and Artificial Lighting

Now, if you want a bit more control without breaking the bank, artificial light may be the way to go. There will be situations that call for such control. For example, if you plan on selling watches online, you may want a standard white-background setup that clearly highlights the condition of the watch.

In this scenario, I opt for a light box. In my 20-years of watch hobbyist photography, I’ve seen everything from cut-out milk jugs to white IKEA storage cube boxes used for such purposes. Both are good and cheap do-it-yourself solutions, but I’d suggest spending $20 (give or take) on a foldable light box (like this one from Amazon). Before I get into the particulars of this inexpensive solution, here is a picture of my makeshift basement photography studio.My setup includes: light box, tripod, cardboard backdrops, vellum paper, a twistable IKEA floor lamp equipped with a 5,500K LED lamp, and painter’s tape to hold things down. Some photographers may have multiple-flash setups with reflecting dishes, but this set-up costs less than $40 and gets the job done.

Save

Save

Save

Save

Save

Save

Save

Advertisement

I chose a 5,500-6,000K lamp as it approximates cool daylight (refer to the link on color temperature above). The more neutral the color cast, the easier it is to edit and change color moods later. Vellum paper is simply tracing paper and it is used to further diffuse the light. Even without a lightbox, using vellum paper is a good technique to soften the blow of illumination. The light box then helps spread the light evenly for good coverage. It also keeps the subject–which will in many cases be a shiny stainless steel watch–from reflecting harsh and blown highlights. The large cardboard poster paper is used for backdrops. The green stock is good in the event you want to do fancy greenscreen photography, but most of the time I stick to white or black backgrounds. For flat-lay style photographs, Home Depot sells tiles if you fancy marble and wood-textured backgrounds.

Here are some images produced using a light box and my Canon T3 Rebel. As you can see, there’s a wide variety of styles here. As you may have guessed, to achieve some of the effects you see here, there is some post-production work that takes place (which we will cover in future installments), But the fundamentals are done in camera. For example, the photograph of the Seiko SRP 777 “Turtle” is done using aluminum foil and water to simulate a cold, Artic look.

Now, once you’ve played a bit with lighting, you can begin to experiment with everything else that photography has to offer. The next few articles will cover depth of field, some basic post-production, and mobile applications. Stay tuned, but more importantly go out and get creative.

Save

Save

Save

Save

Save

Save

Save

Related Posts
As a collector who splurged during the glorious dotcom 1.0 days, Hung acquired a sizable collection of Swiss watches. Now married with two kids and a mortgage, his watch tastes and pursuits are more down-to-earth. His other interests involve design history, technology, and collecting Star Wars Action figures. He brings a seasoned perspective to the Worn & Wound team. Hung grew up and lives in the San Francisco Bay Area.
Categories: